Table of Contents
After settling on a winning concept, prototype development is the next step in product development. In this phase, you will transform your drawings and CAD models into physical objects before testing them for form and function. Prototypes are a great way to showcase your ideas, test concepts, refine your design, and garner attention from investors. In this guide, we cover everything there is to know about prototypes, including how to build a prototype.
What is a prototype?
A prototype is an inexpensive, preliminary model of a concept used to test and refine design and functionality before manufacturing. A product prototype can be anything from a simple proof-of-concept 3D printed model to a machined functional unit used for derisking. By creating and testing prototypes, you can identify and address design flaws before investing significant time and resources in manufacturing. Prototypes are also a way to gather user feedback and evaluate product performance.
Be prepared to make several prototype iterations as you develop your product. You can plan on needing at least a hundred functional prototypes for the next stage, new product introduction. These units test and refine everything from the assembly process to packaging to biocompatibility.
Why do you need to make a prototype?
As we stated earlier product prototypes are an inexpensive way to test and refine your design. Here are some other reasons why prototypes are a necessary part of the product development process:
Prototypes allow you to improve your product or system’s usability by putting it in users’ hands. You can test and refine human factors and ergonomics with prototypes.
Prototypes help you communicate your ideas to others, such as stakeholders, team members, and investors, by providing a tangible representation of the product.
Prototypes reduce costs before manufacturing by allowing you to test everything from part fabrication to the assembly process before moving into production. When a simple tooling change costs tens of thousands of dollars, it is much better to spend less early on and make several iterations of prototypes.
Most startups and inventors fund their projects through venture capital and investors. As you advance through the development process, product prototypes can be used as demos and sales units to peak interest and sell units before your product hits the market.
Consumer feedback is a method of gaining insight into what others think of your design. Prototypes allow designers to gather feedback from the intended audience and incorporate their input into the design process. It is not uncommon to develop product prototypes that conceptually appear to be the correct dimensions, but once assembled, you realize that the product is slightly too big to use. Prototypes put the product in the customer’s hands so they can provide feedback about what you can change or improve.
How long does prototype development take?
In our experience, prototype development takes a few weeks to several months. However, we have seen it take years for complicated pieces of capital equipment or novel technology. Here are some things we consider when estimating how long it will take to develop your prototype:
- Design complexity – Complex designs may require more time, especially if they need specialized tools or materials.
- Prototyping method – Some prototype manufacturing methods, such as 3D printing or CNC machining, can be faster than others, such as manual prototyping or molding and casting.
- Resource availability – The prototype development process may be faster if resources like materials, equipment, and skilled labor are readily available.
- Level of detail required – More detailed prototypes may require more time to develop, especially if they require intricate features or complex shapes.
Work with experienced prototyping professionals and carefully consider the design, resources, and prototyping method to ensure the process is as efficient as possible.
Tips for developing prototypes
Over the years at Synectic, we have developed thousands of prototypes and amassed decades of experience. Here are some of our most valuable tips and tricks to get you started:
- Remember your prototype’s purpose and identify what the product prototype will test and who the target audience is. Doing so will give you an idea of what prototyping material and method to you should use, as well as the possible costs.
- Focus on user experience by understanding the end user’s needs, preferences, and behaviors, and design your prototype accordingly.
- Choose the right methods and materials that fit the prototype you are developing. For example, if you need a basic product prototype to check size and shape, you can use 3D printing instead of machining the part.
- Refine and test your prototypes frequently, as product prototyping is an iterative process. Investing a lot of time and money in the prototyping stage is better than missing something and only discovering it once you begin manufacturing.
- Keep thorough documentation of all processes, concepts, testing results, and any modifications you make. This documentation is vital for communicating between yourself and the development team but may be required by regulatory bodies.
- Work with an experienced prototype development company that can offer guidance and expertise in design, engineering, and prototype manufacturing.
How much does a prototype cost?
We recommend overestimating the amount of money you will need for prototype development, as the cost of a prototype can vary widely depending on complexity, materials, type, and level of detail. For example, a simple prototype may only cost a few hundred dollars, but a functional prototype with complex electronic components can cost tens of thousands.
When factoring in cost, remember that you will make several product prototypes before you freeze your design. Also, once you get to later iterations of your prototype, you will need several dozen copies to test and refine everything from function to the manufacturing and assembly process.
Additionally, your cost can depend on the product prototyping process. While 3D printing is an inexpensive way to build prototypes, especially for small production runs or one-off designs, methods like injection molding can be more cost-effective in the long run.
We want to note that building a prototype is an investment. When factoring in cost, you should weigh it against the potential benefits of extensive testing and refinement before investing in full-scale production. Ultimately, investing in a professionally produced product prototype from an experienced prototype development company, like Synectic, that meets the project needs while staying within budget is invaluable.
How many prototypes do you need?
Similar to cost, the number of prototypes you will need can vary. It is common to produce multiple iterations of prototypes during the prototype development process.
Product prototyping involves a lot of testing against the requirements set in the product development specification. Depending on the type of testing you need, it is common to go through several dozen prototypes during testing.
Additionally, once you start moving from prototype development to new product introduction, there is packaging testing, assembly process testing, and testing lot builds. All of these tests require the physical product to perform the test. Remember that all iterations are considered prototypes until you mass-produce your final product in a controlled manufacturing environment.
If you are developing a medical device, you will need at least a hundred units to pass FDA inspection for all the necessary testing, such as biocompatibility and sterility. However, since prototypes are lower cost than production units, performing testing as early as possible will allow you to make design tweaks without ruining your budget.
What are the different types of prototypes?
The prototype you build will depend on your specific project needs and the development stage. The main types of prototypes we use at Synectic are breadboard, alpha, beta, and production.
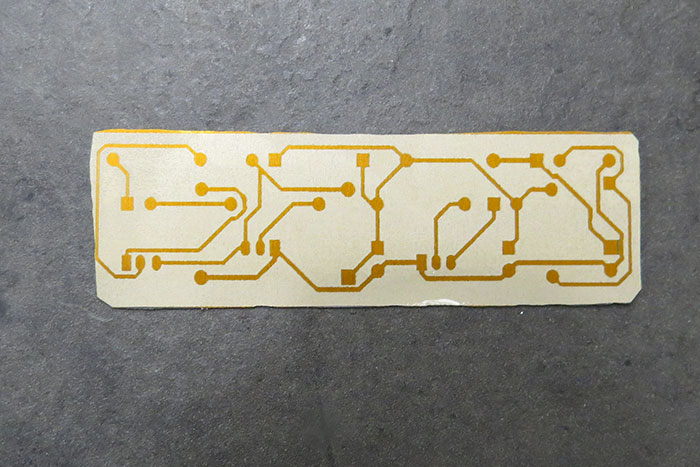
Breadboard prototype is a term commonly used in electronic design and electrical engineering. It is a physical prototype used to test and validate circuit designs quickly and easily without needing soldering or other permanent connections. A traditional breadboard is typically a plastic board with holes drilled into it, arranged in a grid pattern. Metal strips run underneath the board, connecting the holes, and when someone inserts a component into the board, it forms a rudimentary circuit.
At Synectic, we refer to any basic prototype used to test proof of concept as a breadboard. We frequently make breadboard prototypes from simple parts found at any hardware store. Often a breadboard looks nothing like the finished product as it only tests one action, such as how much torque is needed to screw on a part or whether a new syringe design will work with a viscous liquid. Because they test a single design aspect, breadboards are an inexpensive way to determine if you should continue developing your idea, take a different direction, or scrap it entirely.
A production prototype is a fully functional model mimicking the finished product in function and appearance. These prototypes are built in later phases when the design features are frozen. Production prototypes help refine production and assembly during new product introduction before manufacturing. The production method used to produce a functional prototype should closely resemble the process intended for full-scale production.
Depending on your product, production prototypes are sellable units. However, they may differ from the final product because the production process may not match the fabrication method used in contract manufacturing. For example, the production prototype may be made from cast urethane, while the final manufacturing process will be injection molding.
The different prototyping methods
There are many different types of prototyping, but the industry’s two most common prototyping methods are additive manufacturing and subtractive manufacturing. In additive manufacturing, most commonly referred to as rapid prototyping or 3D printing, a material is built up (added) in layers to make a part. Subtractive manufacturing, which consists of various machining methods, is the opposite process. In subtractive manufacturing, the material is removed (subtracted) from a larger piece to produce parts.
In addition to the types of prototyping mentioned previously, you can fashion prototypes by molding, casting, and even carving out material like foam or clay. Using one of these methods or a combination, a prototype developer can create functional prototypes that accurately represent the final product.
3D printing
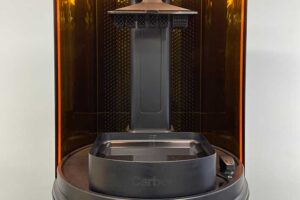
3D printing is a popular product prototyping method for creating fast, inexpensive prototypes. With 3D printing, you use a 3D printer to create prototypes from various materials, such as plastics, metals, and composites. The 3D printer takes a digital model made with computer-aided design (CAD) software, digitally slices it into thin layers, and then prints each layer. Next, the printing material, such as a filament, resin, or powder, is melted or cured by a laser or other heat source to create each layer. Then the 3D printer repeats this process layer by layer until it produces the desired object.
While on the surface, 3D printing appears to be the magic solution for all design challenges; there are limitations to the technology. When designing a part for 3D printing, we recommend considering several factors, including available technology, part orientation, wall thickness, and feature size. An experienced CAD designer familiar with the pros and cons of each available technology, like Synectic’s engineering team, can be an invaluable asset as you develop your prototype.
Computer Numerical Control (CNC) prototyping is a type of machining that uses computer-controlled machining tools to make a prototype. Like 3D printing, CNC prototyping requires you to start by creating a digital model of the part using CAD software. The CAD model is then used to program the CNC machine to cut or shape various materials, such as metal, plastic, or composite, into the desired form. This process is extremely precise and creates highly accurate complex shapes and features.
CNC prototyping is often used in the later stages of product design when the design refinement requires more precise and complex product prototypes. While CNC prototyping can be more expensive than 3D printing, it offers greater precision using a wide range of materials, making it a valuable tool during prototype development.
Molding and casting are methods of creating functional prototypes using silicone molds and casting materials, such as urethane. This process is used for creating small production runs or prototypes because you can make multiple copies using the same mold.
Molding creates a negative impression or mold of the original master model. The molder pours silicone or urethane over the master model and allows it to cure. Once the mold cures, they remove the original master model, leaving behind a negative impression (mold) of the part.
The casting process involves pouring a liquid material, typically resin, plastic, or metal, into the mold to create a positive impression of the part. The casting material is left to harden before removing the finished product from the mold.
Manual prototyping is often used in the early stages of product design as a cost-effective and efficient way to explore different concepts before investing in more expensive or time-consuming prototyping methods. It involves creating a product mockup using hand tools and materials like foam, clay, or wood. However, while manual prototyping allows you to iterate and refine your prototypes quickly, it may not be suitable for complex or precise designs.
Can I make my own prototype?
You can try and make your prototype without using an outside company, and many people who come to us already have a basic prototype they have made themselves. However, as we have seen time and time again, those basic prototypes require significant work. The prototype’s exterior design is one thing, but you must develop and refine things like functionality, tolerances, and manufacturability before manufacturing your product. Therefore, homemade prototypes can only take you so far before you must involve a professional product development company like Synectic, to finalize your working prototype and move it into production.
How to make a prototype
Now that we have reviewed everything there is to know about prototypes let us review how to make a prototype. While the process will vary depending on your prototype’s individual needs, there are some basic steps we take when making a prototype.
The absolute first step is to sketch out your concepts. You do not need to be an industrial designer to create a basic sketch. Many first-draft sketches are rough geometric drawings that get your point across.
Rudimentary sketches help set the stage for building a physical prototype and focus your thoughts. They also can be a guide for proportions and dimensions. You may find that when sketching your concepts, they do not fit with what you originally pictured. That is ok and is why we recommend putting your ideas on paper. Sometimes you will find a necessary change or a solution to a previously unsolvable design problem.
If you plan on patenting your idea, which we strongly recommend, the patent office requires sketches. These drawings are necessary to prove you own the design. They do not have to be the final design, only the concepts behind the design.
Sketches also keep your ideas organized. We recommend having an organizational system for all your drawings. Whether you use a numbering system such as Drawing A v.2.0 or a date-based system, the goal is to keep everything organized and consistent. You will probably have dozens, if not hundreds, of sketches by the time you get to production, so keeping organized is crucial for staying on track. When sketching out concepts, we generally want two to three solid ideas before moving on to modeling.
Once you have chosen a concept that aligns best with your PDS, your next move should be to develop a virtual model. This type of modeling uses CAD software to transform your 2-D sketch into a 3-D representation.
If you are unfamiliar with CAD software, many simple courses and tutorials are available online. Additionally, you could outsource this part of the prototype development process. Synectic has dozens of years of experience with CAD modeling and would be happy to CAD your sketches. Costs will vary depending on the complexity and the number of designs you need to render.
There are many ways to make a product prototype, including cobbling together items found in your home. At Synectic, we utilize several different prototyping techniques when building your prototypes. The ones chosen depend on what stage of the process we are in and what the prototype needs to do. If the purpose of the prototype is to get a rough idea, we generally 3D print the part using various 3D printing methods. If the prototype is for testing, we incorporate as many finished materials and production methods as possible. Therefore we may build it using several production methods such as SLS, CNC machining, and even off-the-shelf components.
Both types of prototyping require solid CAD models to create a product that matches the outlined design requirements. Tolerances, assembly orders, and materials are all design requirements that any prototyping house will need before they start making your parts. You can use modified off-the-shelf components for early prototypes, but this is not sustainable for mass production. You will eventually need to formalize your design and create production-ready prototypes with professionally produced parts. It is better to find an experienced prototype development company early during prototype design as part-production lead times can take weeks if not months.
Prototype development is not production. Simply because you have a physical model does not mean you have a working product. For example, you could have the best design on paper, but it could translate poorly into a physical prototype. Another example would be having a solid prototype, but it costs you ten times your budget to mass produce.
It is not uncommon for your design to translate well from a CAD model to a physical prototype. Your materials may need to be stronger to handle the torques created. The components may make the product too bulky to hold comfortably. Finally, you may have over-designed your parts. Testing and prototype refinement address all of these problems.
When setting up your tests, understand that you cannot perform all tests using one product prototype. We recommend producing at least one hundred prototypes for testing. Each time you refine your design, you must build and test another version of your prototype. You should expect to repeat this process several times as you move closer and closer to your final design. The more testing you do, the better because, in the end, excessive testing saves you time and money by preventing a costly and sometimes business-ending recall.
How do you test prototypes?
Testing during prototype development is one of the most important things you can do. When speaking with our clients, we emphasize testing early and often as it helps identify and address design issues early on, saving time and money later. Testing requires careful planning and analysis involving various prototype testing methods to confirm if your prototype design meets the product development specification. Here are some steps to test a prototype:
- Define testing objectives: Before testing the prototype, you must first define testing objectives, including what needs testing, what data to collect, and the success criteria to evaluate the results.
- Conduct functional testing: Test basic functionality, including checking that all parts work as intended and ensuring the prototype meets the required specifications.
- Conduct user testing: Test the product prototype with users to evaluate their experience and feedback, including observing how users interact with the prototype, collecting feedback on usability, and identifying any issues users encounter.
- Conduct performance testing: Test the prototype’s speed, reliability, and durability under various conditions.
- Analyze test results: After testing, analyze the results to identify any issues or areas for improvement. This includes reviewing feedback, identifying technical issues, and recommending further testing or modifications.
- Iterate and refine: Based on the results, iterate and refine the prototype as needed, including making design modifications, adding or removing features, and testing the new version again against the required specifications.
How do you refine prototypes?
Refining prototypes is an iterative process involving making changes and modifications to the prototype based on feedback and testing. Here are some steps for refining prototypes:
- Collect comments and criticism from stakeholders, team members, and end-users.
- Analyze the feedback collected and identify the most common issues or areas that need improvement.
- Make changes and modifications to the prototype based on your findings.
- Test and evaluate the refined prototype to ensure the changes have addressed the issues.
- Document the changes made to the prototype and any design iterations, testing results, and modifications made.
- Repeat this process multiple times until the final product or system is ready for production or launch.
We cannot stress enough how critical prototype development is to the product development process. The “refine, prototype, test” cycle is repeated several times for components and the whole design before manufacturing. If you do not have a solid working product prototype before you start the new product introduction process, your product may not work. If your product fails, you may lose hundreds of thousands of dollars in tooling, setup, and production costs. The most severe outcome would be if your product reaches the hands of a customer and they get seriously injured because of a design flaw. No business owner wants to face a lawsuit or a recall after a product launch. Proper prototype development and testing prevent these things from happening.
About Synectic Product Development: Synectic Product Development is an ISO 13485 certified, full-scale product development company. Vertically integrated within the Mack Group, our capabilities allow us to take your design from concept all the way to production. With over 40 years of experience in design, development, and manufacturing, we strive for ingenuity, cost-effectiveness, and aesthetics. Learn more about our prototype development services and see how we can help with your next project.
